One of Zion’s most popular activities, hiking the Virgin River through the Narrows is an awe-inspiring bucket list experience. You’ll want to capture the moment, so here are some photography tips for hiking the Narrows based on my two trips through the canyon during different seasons.
Please see my notes about gear, safety, and tips to help ensure a safe and successful adventure. You will be hiking through ankle to thigh-deep water, varying depending on the time of year. See “tips” for keeping your camera gear safe.
Key Information
- Location: Virgin River, Zion National Park, Utah
- Trip Dates (for this post): March and November
- Difficulty: Moderate to difficult depending on water level and distance traveled up the canyon
- Permits: None for day hike (overnight requires permits from the National Park service)
Recommended Gear
- Rent a drysuit/wetsuit from outfitters in Springdale UT for the cold water
- Hiking poles
- Extra change of clothes in your car
- Hat and gloves
- Lightweight tripod
- Circular polarizer and ND filters
- Snacks
- Water filter
- Bring a hiking backpack (e.g., Osprey Atmos 65) with kayaking/boating dry bag to safely store your gear.
As well as a paracord to secure all equipment to your wrist at all times when you are taking pictures. If you have an older backup camera, this may be the time to use that body instead of your brand new camera in the unlikely event of a fall in the cold swift waters of the Virgin River.
Hiking Safety
Check with the Zion National Park Service (NPS) visitor center in Springdale, Utah to see if the Narrows is open to the public. Summer storms can create deadly conditions due to flash flooding and getting trapped in the slot canyon.
The NPS rangers office closely monitors NOAA forecasts and can/will close the river access if there is a chance of precipitation/flash flooding. Your safety is their highest priority and there is always another time to safely experience the Zion Narrows.
Photography Tips
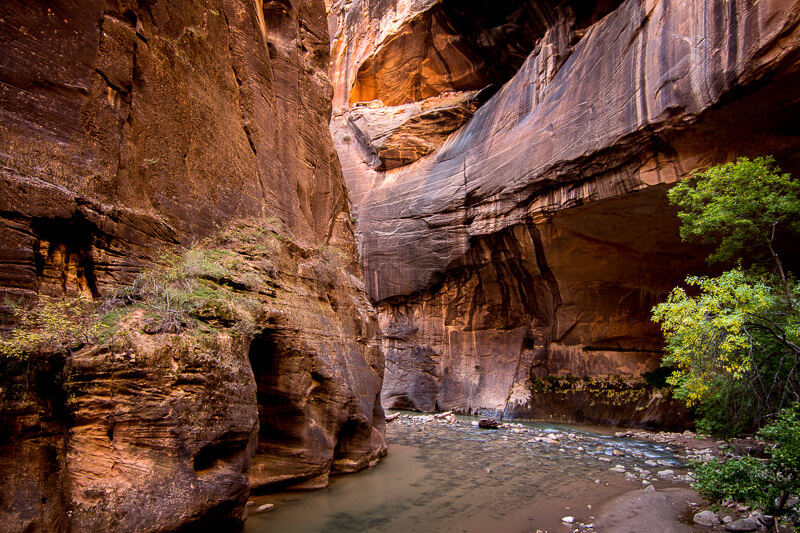
Maybe I am just drawn to waterfalls – their power to shape the earth and peacefulness. But add in small waterfalls that you can stand next to and vibrant rocks and rocky foreground, and you get a winning composition.
Filters for long exposures
I used a circular polarizer filter to reduce glare, increase color saturation, and allow for a longer exposure. I’d recommend using this with a 6-stop ND filter.
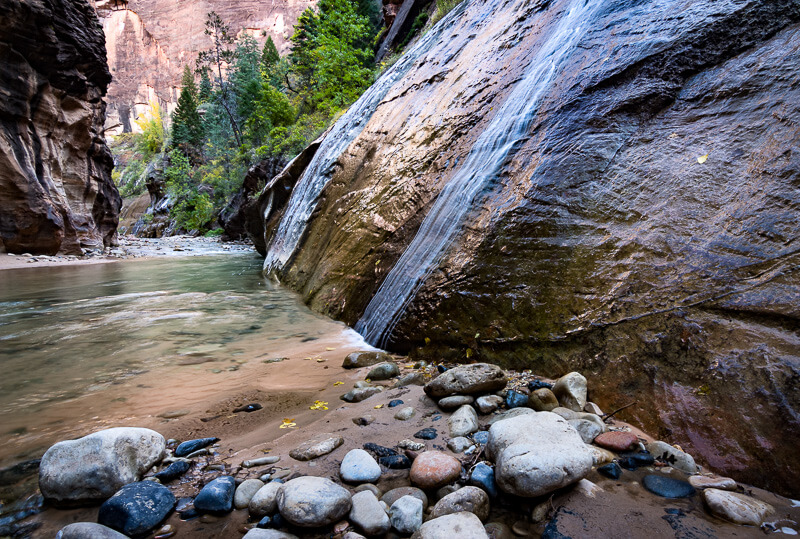
A 6-stop ND filter, you would probably get 10 to 12 seconds of exposure, depending on ambient lighting. This allows for more water blur and swirling in the pool at the base of the (slow flowing) waterfall. This isn’t the PNW where water is tumbling everywhere.
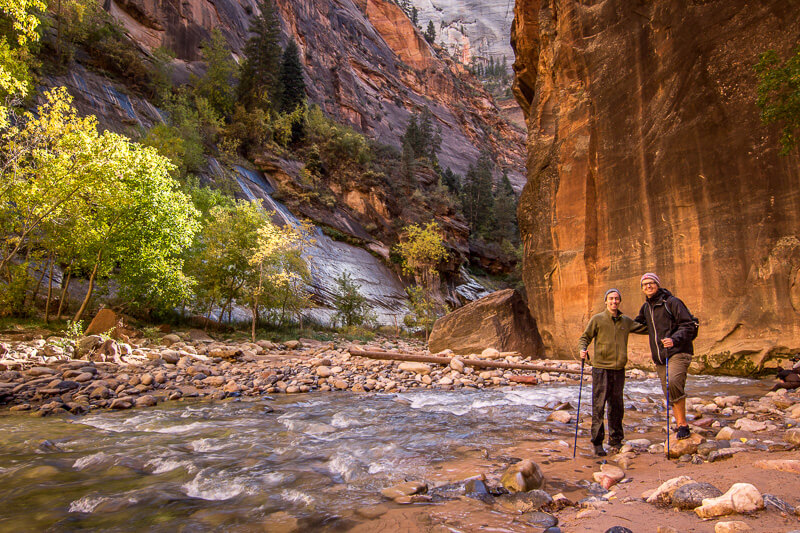
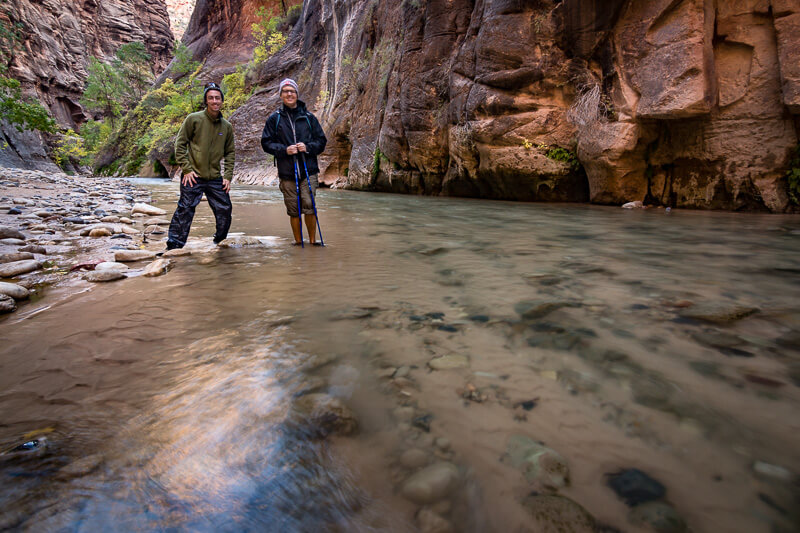
The Human Element
Often I forget to include a picture of myself on adventures. Using a tripod, I set up a 10-second remote timer and hurried over to where my hiking buddy was standing.
Compelling Foreground
The foreground emphasized the clarity of the water and rocks beneath the surface. Added bonus – these shots come in handy for blog and social media posts. The fallen logs juxtaposed with immense and steep canyon walls, and the colorful rocks, made for an interesting composition. The water was also crystal clear and you can see every detail of the rocks beneath the water’s surface.
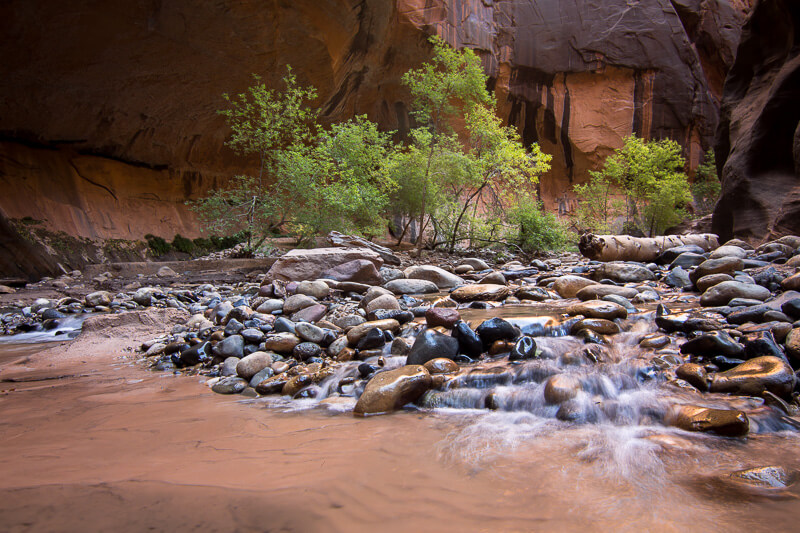
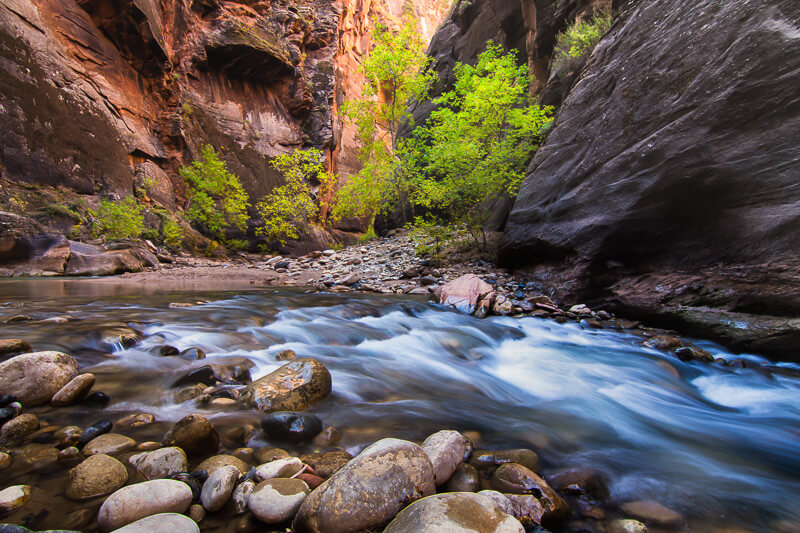
In mid-March, the new leaves of the canyon trees were vivid shades of green. While I enjoyed these trees and thought they’d make for an interesting subject if isolated using a telephoto lens, I included the sandbar and rocks in the scene. Setup on a tripod, I did a 2-second long exposure to capture the water flowing over the rocks without blurring the movement of leaves. The curving texture of the sandbar in the foreground was an added bonus.
Focus on Unique Light
Photography is all about chasing the light and in the Zion Narrows, the same fundamental principle applies. The viewer is drawn to the lightest point – the warm bright light at the turn of the canyon.
Anywhere there was light, the canyon diffused it and under certain conditions, created a warm glow.
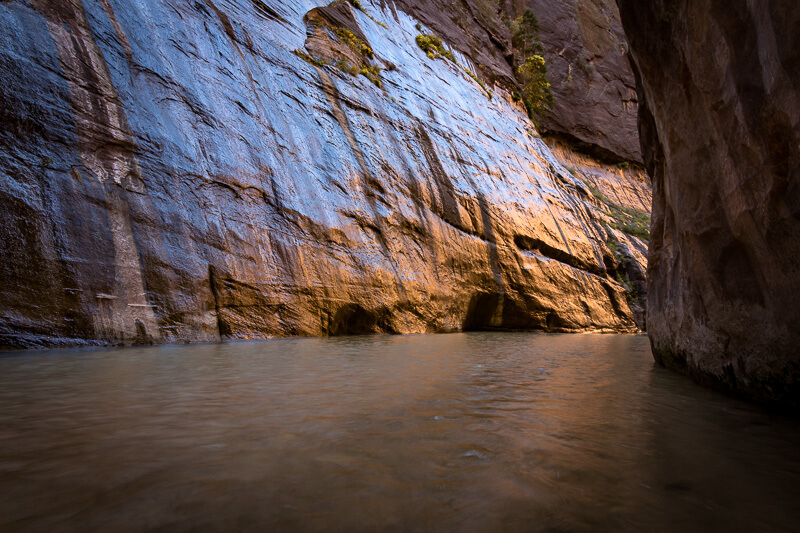
A vivid orange color against cold canyon walls. I did a long exposure for the flowing water to move the viewer through the scene toward the warm pocket of light.
Contrasting/Layered Subjects
The fall colors of the trees growing in an impossible environment caught my attention; after all, you’re photographing in the middle of a steep slot canyon with less than a foot of land area along the river’s shore. The layers of the canyon walls provided a nice backdrop.
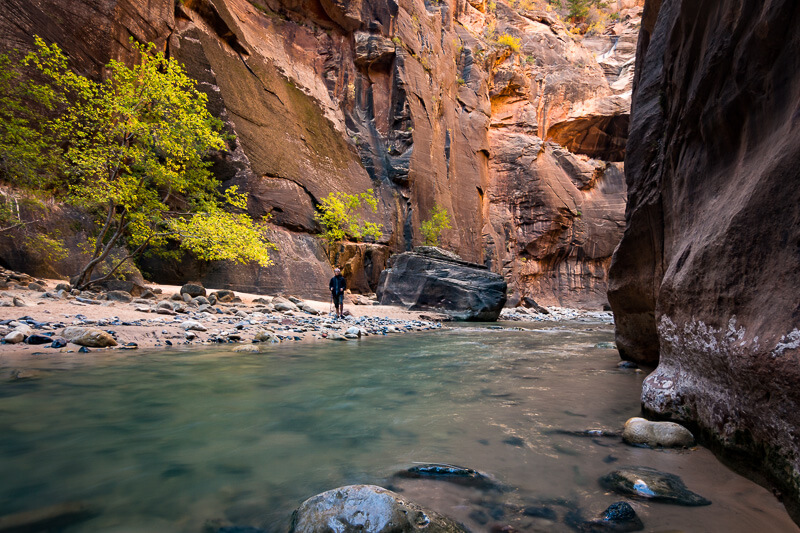
The foreground has beautiful, crystal clear Virgin River. If the wind is high, then you may need to take a short shutter speed (1/500 sec, 1/320 sec) to ensure the leaves are tack sharp and then blend together in post processing. I got lucky with low wind and calm conditions on this adventure.
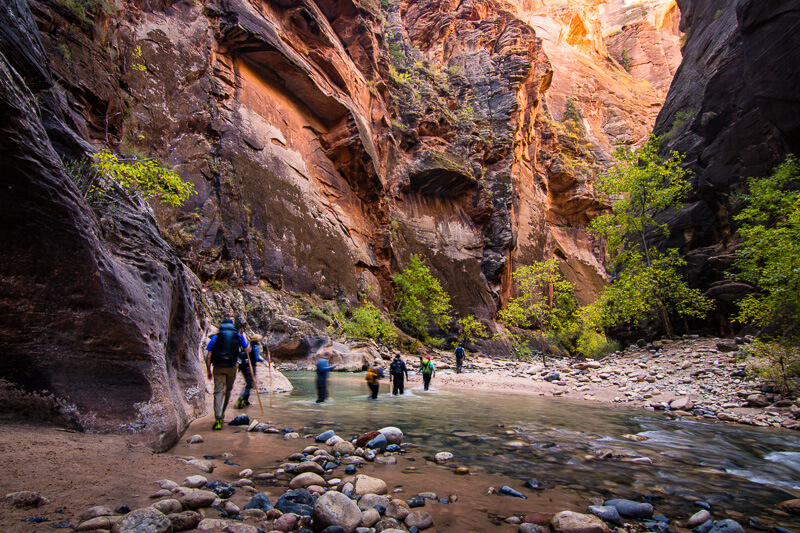
Adapted Rule of Thirds
While the classic rule of thirds that is common in photography, the 3×3 grid, my rule of thirds helps me compose photographs by breaking the scene into three pieces.
- Interesting foreground. The lower third of the scene, the foreground, is the Virgin River. This leads the viewer into your photograph.
- Middle ground. The middle third of the scene is the vibrant yellow of the forest.
- Background. The upper third is the steep and colorful Zion canyon walls. Many scenes I photograph have mountains and sky – that ideally have dramatic stormy clouds or milky way/starry skies.
More posts to follow on composition tips and how to improve your photography by mastering composition and other fundamentals of photography.
